


Wedding Photography Flash Basics
March 12, 2020
This blog post is aimed specifically at all those photographers who want to start shooting weddings but don’t know how or where to begin. When I was starting out I was overwhelmed by all the information I found – and so many resources may tell you different methods.
This blog post goes through what I use. I’m not an expert in flash – I’ve only been using it for a few years now. So take everything I say with a grain of salt. I also primarily shoot weddings, so everything you see here will be in the context of photographing a wedding day.
There’s nothing wrong with other methods but I have found that some of them are too time consuming for a wedding day. I need to be able to quickly adjust my flashes to get the shot I need and I don’t always have the chance to take a bunch of test shots.
I use flash ~80% of the time on a wedding day. It gives me so much more control of my light situation and I don’t have to be dependent on whether or not there’s natural light available.
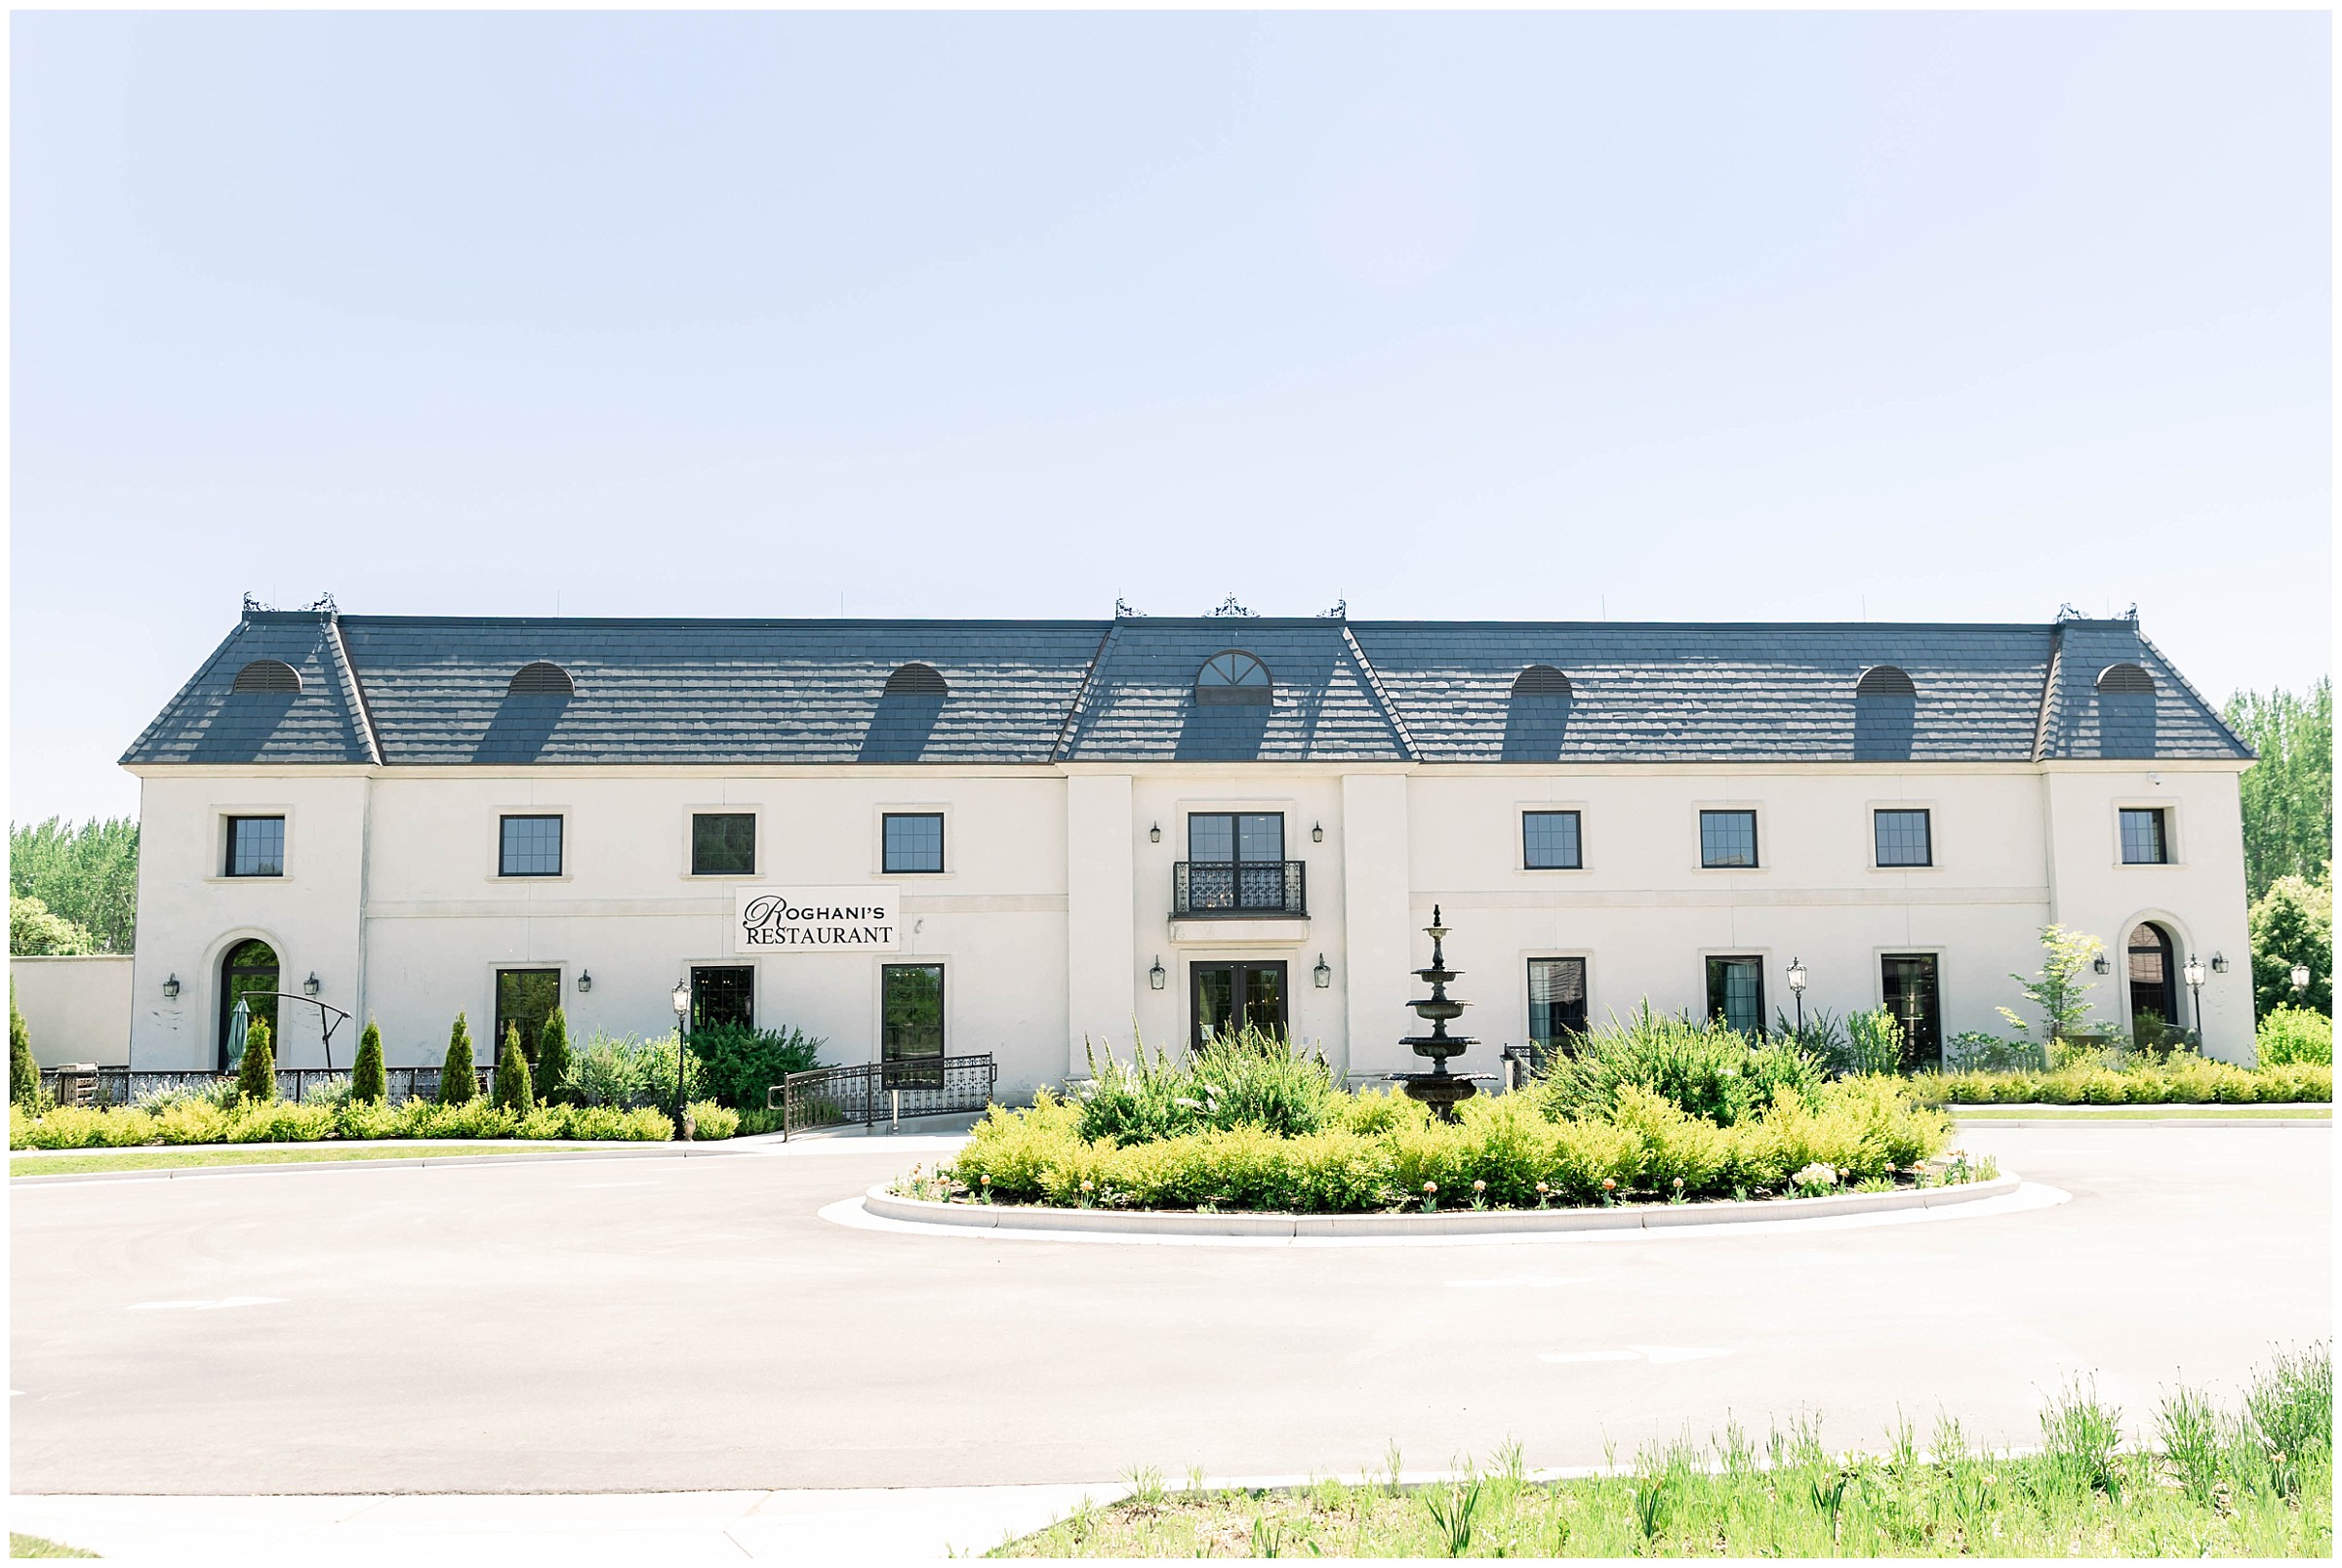
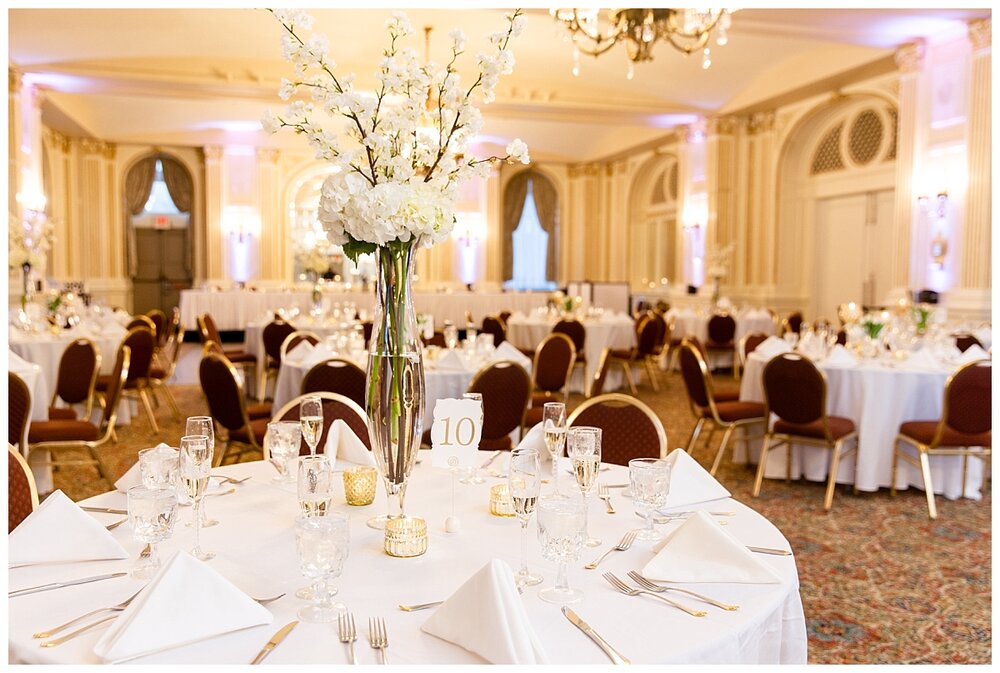
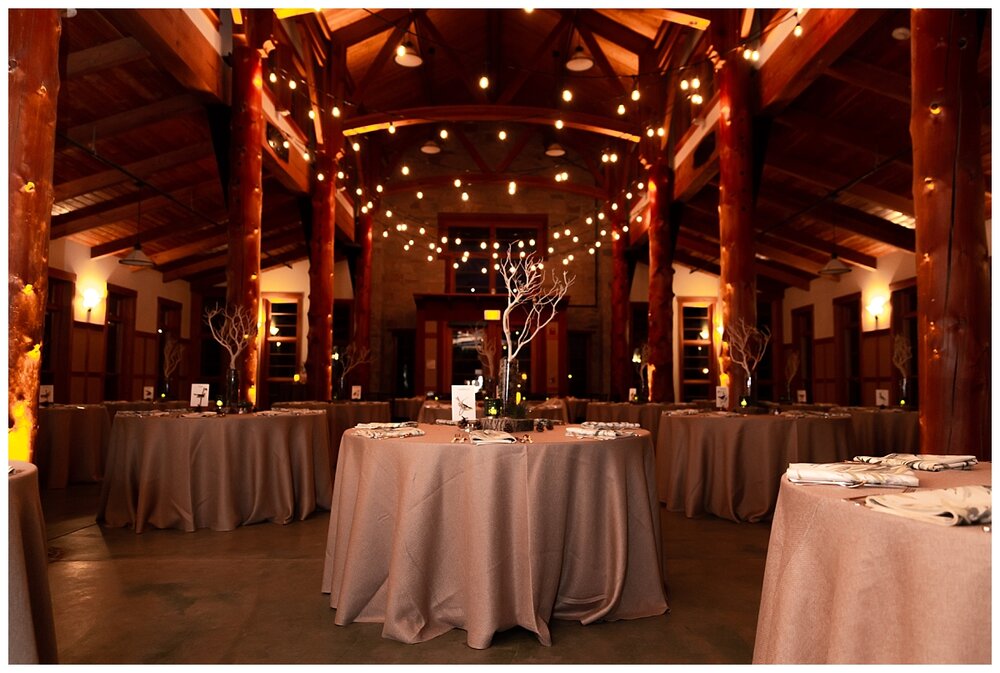
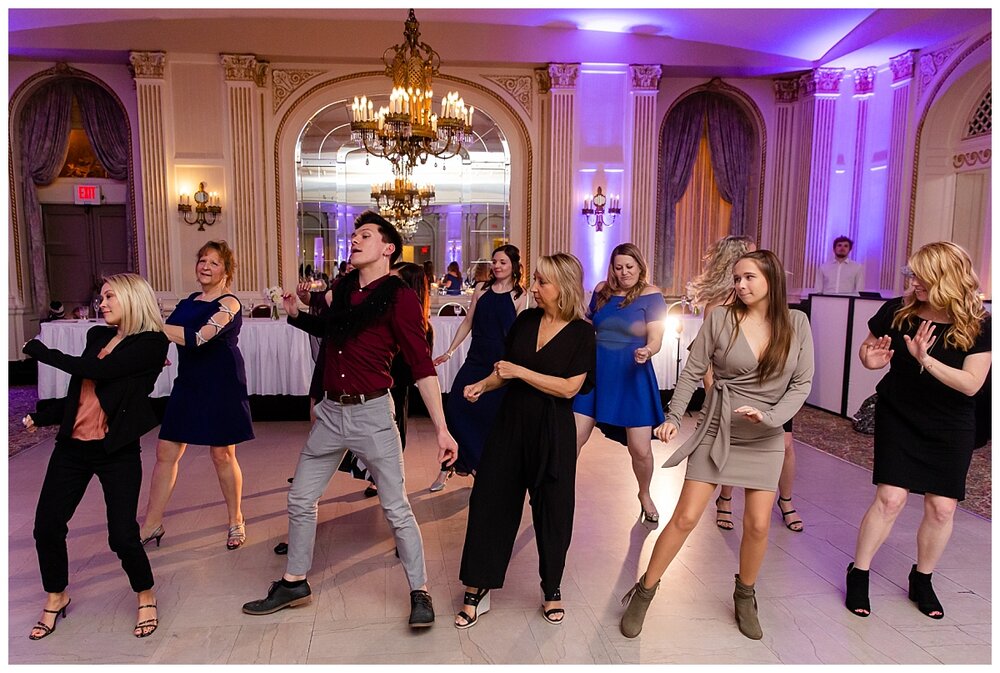
You can use flash even in venues with a lot of natural light. On camera flash bounced at wall or ceiling. Camera settings: ISO 1600, F 2.8, 1/200
Gear
First of all, I shoot on a canon 5D mark IV. So I can mostly speak to canon gear. I’m not always sure about the Nikon equivalent.
When selecting your gear you will want to consider a few things:
-
Does the flash have enough power to do what you need it to do?
-
If you’re shooting weddings you could be at venues with really high ceilings and you might need a LOT of power to be able to bounce your flash off the ceiling. This means you’ll need a more powerful flash.
-
-
Does the flash work as a wireless system out of the box or will you need to buy extra triggers to make multiple flashes fire simultaneously?
-
Some flashes have built in wireless transmitters so they can talk to each other. Others don’t. It’s not a big deal if they don’t, it just means you will have to purchase a few extra things to make them work together and some of those things may or may not be wireless.
-
To me, wireless is a MUST for wedding photography.
-
-
What is the recharge time for your flash?
-
All flashes need some time to recharge – you can’t take multiple pictures rapidly in succession. However, some flashes have a better recharge time than others. If you have a flash with a poor recharge time, you could be stuck waiting a minute before it can fire again! Think of all the potential missed moments? A good recharge time for a flash is a few seconds. Keep in mind though that many flashes still have a limit to the number of times they can fire within a few minutes without overheating.
-
Want to know what gear I use?! Get the full list here!
I recommend starting with one flash/speedlight on your camera and learning that. Then as you get comfortable expand to one on camera, and then one off camera. From there you can expand to multiple off camera and play around with modifers.
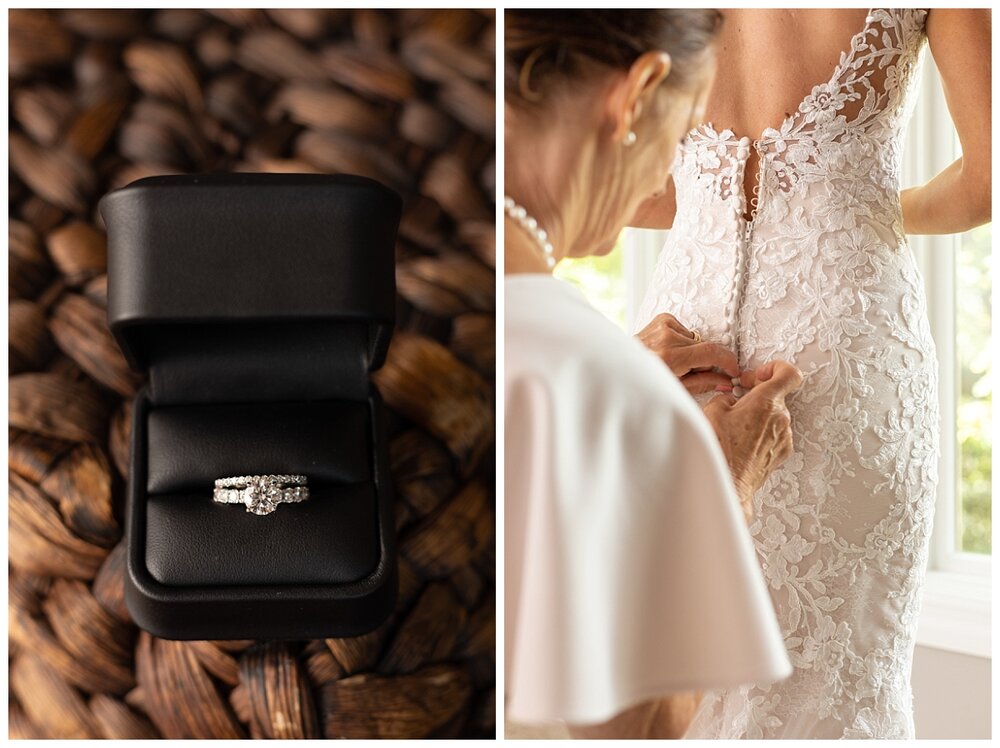
Ring shot single on camera flash bounced at the wall (camera left). ISO 400, F 4.0, 1/160.
Getting ready shot single on camera flash bounced up and towards camera left. ISO 200, F 3.5, 1/160
Flash Modes
I’ll start by explaining some of the basic settings on a flash. Speedlights have different modes available.
-
ETTL (Evaluative through the lens metering)
-
This of this mode as an automatic mode for your flash. Putting your flash in this mode will give you a good starting point if you have no idea what you’re doing. If you put your flash in ETTL, it will try and automatically figure out how much power it needs based on your camera metering.
-
This mode isn’t perfect but is great for beginning flash!
-
-
M (Manual)
-
This is the mode I use! Similar to manual mode on your camera, manual mode with your flash will give you much more control. Manual mode means you’re telling your flash how much power to fire at.
-
The highest power your flash can go is 1/1 or Full power. From there it goes down in increments. So if you have your flash set to 1/2 that means your flash is firing at half of it’s full power. If it’s at 1/64 then that means your flash is firing at a 64th of it’s maximum power.
-
The higher the power, the more flash output, the more energy used. This means a few things – your recharge time will increase if you are firing your flash at full power, and you will need to change your batteries often! Sometimes firing at full power is necessary, but I usually try to up my ISO a bit if I can to preserve my batteries!
-
You will adjust the flash power to adjust the exposure of your subjects – so if your subjects are overexposed, lower the power. If they are underexposed, then raise the power. I usually start around 1/4 power and raise/lower from there depending on the look I’m going for.
-
Some people use light meters to figure out the flash power needed in this mode. I personally don’t use one, but know that it’s a thing if you want to learn!
-
-
MULTI (multiple)
-
I don’t ever use this mode, but I’ll tell you about it in case you want to try it out. Basically the flash will fire multiple times in succession. This can create the effect of someone moving in your photo – think of a strobe light.
-
Single on camera flash bounced at ceiling. ISO 1000, F 3.2, 1/125
Other Flash Settings
There are other settings within your flash that you might want to play around with. Here’s a few that I care about for wedding photography.
AF (Autofocus) Assist Beam
This is a red beam of light that emits from your flash to help the camera focus in a really dark room. Most of the time I turn this off because it can be distraction when red dots appear on someone as I’m getting ready to take their photo. However, I do turn this on sometimes during receptions if my camera is having trouble grabbing focus.
To turn this off and on for the speedlights I mentioned above, press and hold the Zm/C.Fn button until the menu appears. Use the wheel or arrows to scroll to the “AF” option. Select it and you can toggle it on or off.
Master/Slave
This is important when you want multiple flashes to fire at the same time. Use this when you’re ready to move to off camera flash (OCF). I’ll explain more about this later, but for now I’ll explain what buttons to press to get there.
On the Canon/Yongnuo speedlights I mentioned above you’ll press the button that looks like a Z with arrows on either end. You will see either MASTER appear on your screen or SLAVE. Master means that is the flash that is controlling the other flashes. You’ll set the flash that is on your camera as the master to trigger the other ones to fire at the same time. Slave is mode you will set on your other flashes that you want to be triggered by the master flash. When two speedlights are connected you’ll see the “LINK” light change colors – usually green or blue.
High Speed Sync
When using flash, your camera will automatically be limited on the shutter speed. For Canon this is usually 1/200 and below. This is because most flashes can’t be perfectly in sync with a really fast shutter speed unless they are equipped with high speed sync. If you are seeing dark lines across your images, this is a sign your shutter is too fast and you may need to switch to high speed sync.
Before I go any further, I should mention that flash does a decent job of freezing motion. This means that even if people are moving fast, like during dancing, you can use a lower shutter speed than normal with flash and they will still be pretty sharp.
For this reason, I would only need to use high speed sync if I am outside in full sun. However, in these circumstances, I’m usually not using flash because it’s not really my style. IF using flash outside is your style then you may want to make sure whatever flash you buy has high speed sync. This will allow you to raise your shutter speed to what you need. Keep in mind you still don’t want your shutter to be too high, or the light from the flash won’t have enough time to travel to where you need it.
Keep in mind that using high speed sync uses more flash power and also increases the recycle time. So only use it if you really need it.
Rear Curtain Sync/Second Curtain Sync
This setting can be helpful if your shutter speed is really slow and you don’t want a lot of motion blur. Putting the flash in rear curtain sync will cause the flash to fire at the END of your shutter. You will still get motion blur, but you’ll find that your subjects are sharper this way. I use this if my subjects are moving and I want my shutter to go below 1/60 or so. Play around with this and see if you like it – it’s a personal preference here!

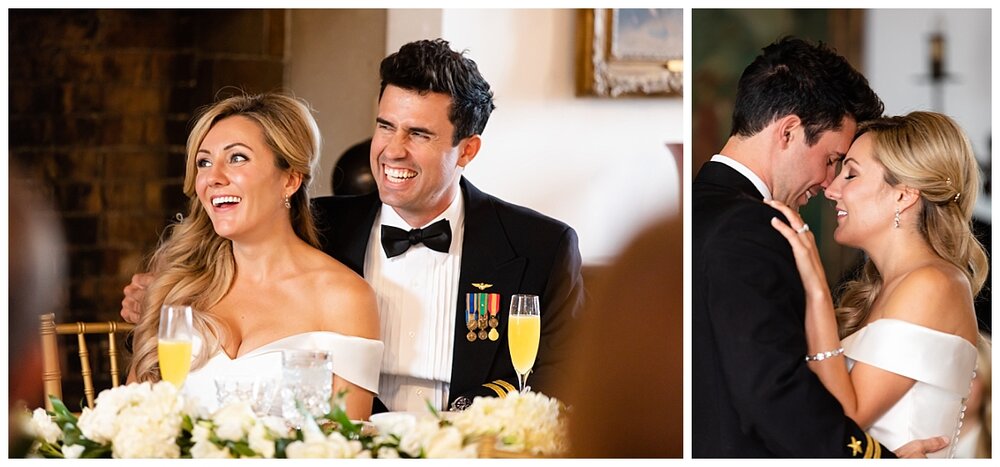
First image has on camera flash bounced at ceiling. Second image has off camera light behind couple along with an on camera flash bounced off of ceiling.
Camera Settings
Shutter Speed
When I think of how I was originally taught about shutter speed, I think about using it to reduce motion blur. So if a subject is moving I want a faster shutter speed. However, this kind of goes out the window when using flash.
When using flash, shutter speed controls the amount of ambient light.
What does this mean? Well, think of a wedding reception. Usually the room isn’t completely dark. There might be some uplighting on the side of the room or some dim lights around the room. This is the ambient light. The slower your shutter, the more of the ambient light you’re allowing in.
Remember that the amount of light your flash outputs at shutter speeds slower than 1/200 will be consistent. Your flash is what is lighting your subjects. So whether you’re at 1/100 or 1/200, the exposure on your subjects will be the same if your flash power is the same.
I try and keep my shutter speed between 1/80-1/200 depending on the amount of ambient light I want coming through. This really depends on your style. If you’re getting total darkness around your subjects but you want more ambient coming through, lower your shutter. If you’re getting too much ambient light then make your shutter faster.
ISO
This really depends on the room and your exact camera. For a full frame camera, you can raise your ISO to 3200 without there being noticeable amounts of grain. I use my ISO as a way to conserve my flash power and get the exposure that I want. When I am using flash, I usually set my ISO last.
I try to keep my ISO between 800-3000 depending on the room. Don’t be afraid to raise your ISO to get the proper exposure. Getting exposure correct in camera will result in less grain than raising your exposure during your editing.
Aperture
For my particular style I’m usually shooting most of the wedding day with my aperture somewhere between 1.8-3.2. However, when it comes to the reception I’m raising my aperture a bit – usually somewhere around 4 (or higher).
This is because my camera can sometimes have trouble focusing in a really dark room. I can use other methods to get it to focus like back button focus, focus on a high contrast area, or using AF assist beam on the flash. These other methods might not be super sharp at low apertures so I find that raising my aperture gives me a little forgiveness in my focal plane so I can still get sharp photos.
White Balance
Remember your white balance helps correct for the color of the light. When you are using flash, you can set your white balance to “Flash” and it will get you pretty close to a decent white balance.
There are ways to add gels (colored plastic) on your flash to match the ambient light. If you choose to add gels to your flash, you can set your white balance how you normally would – whether that is Kelvin or some other method. I personally use Kelvin on wedding days.
Metering
Now you might be asking, what about metering? Your meter in your camera only accounts for the ambient light in the room. This means that if you perfectly expose your image according to your in-camera meter, then you will probably be overexposing your entire image when you add flash. A good rule of thumb is to try and meter for -1 stop (approximately, and depending on your style) in your camera and use your flash to expose your subjects.
If I’m being totally honest, I ignore my meter when I’m using flash. Maybe that’s bad, I don’t know. I’m sure I could be more consistent if I used it. All I’m saying is, don’t feel tied down to your in-camera meter when you’re using flash.
On camera flash bounced off wall camera left. ISO 2500, f 2.8, 1/50
On-Camera Flash
When you connect a speedlight to a hot shoe on your camera, you will never want the flash to point directly at your subjects. The flash will be too harsh! Instead you will want to bounce your flash off of something to soften it up. Think of the light from your flash like a pool table. It can bounce off the walls and ceiling at angles to diffuse the light and make it softer.
The direction you point your flash can change based on the room. Generally I try to point my flash at white (or light colored) walls and ceilings. If the wall/ceiling is colored, the light from the flash can pick up that color. You might especially see this in wooden barn venues – if you bounce the light off the wood your pictures will have an orange hue to them. If there are NO white ceilings or walls, then you might be able to use your white balance to correct for the hue or use a flash modifier so you don’t have to bounce your flash. More on flash modifiers later.
I also avoid bouncing my flash off windows and mirrors – you may get unexpected behavior this way. Some venues have beams or vaulted ceilings. This can cause your flash to bounce in strange ways as well depending on where you are standing. Sometimes your flash can get “stuck” bouncing around the beams and never make it back to light your subject. If this happens, try bouncing off a wall, raising your flash power, adding a modifier, or switching to off camera flash.
A good starting point is to point your flash directly up, directly to the side, or at a 45 degree angle up, and a 45 degree angle behind you. Each method will have a slightly different look so try them out and see what you like.
On Camera Flash bounced off a white wall – ceilings were wood. ISO 2000, f 4.0, 1/80
Moving to Off Camera Flash (OCF)
Yay! You made it to my favorite part – Off Camera Flash (OCF). Using OCF can really enhance your images to make them look more professional, more dramatic, and give you more control of your light. Once you transition to off camera flash, the possibilities are endless!
Off camera flash with MagGrid camera left. ISO 2500, f 4.0, 1/30. This would have been a good image to put another light behind the couple so they pop off the background more!
Step 1 – Set up your flashes to talk to each other wirelessly
As I mentioned above, you’ll want to designate one flash as your master flash, and any other flashes as a slave flash. Press the Z (with arrows) icon to get your flashes in the right mode. When they have linked together wirelessly you’ll see the LINK light change colors.
Step 2 – Designate Flash Groups for Each Slave Flash
From the master flash, you’ll be able to set the power of all the slave flashes. This is awesome because you don’t have to physically walk over to a light stand and set the power of a slave flash whenever you want to make a change.
If you have multiple off camera flashes you may want to set them up into groups. For example, group A will fire at half power, group B will fire at 1/4 power, and maybe group C will fire at full power. To do this you will want to designate flash groups on each of your slave flashes.
You can press the “Gr” button (third menu button) and you’ll see the slave flash change from group A through E. Set the proper groups on each of your slave flashes. Note that your master flash is automatically in the A group. So if you want your off-camera flashes to fire at different powers, you’ll need them to be in group B, C, D, or E.
Step 3 – Set the Ratios on the Master Flash
On the master flash, you can set the ratios of each flash group. Select the Ratio menu option (second menu button) to change between different group options (e.g. ALL, A + B, A + B + C). Select the Gr menu option (third menu button) then use the scroll wheel to select which flash group power you’d like to adjust and press the A +/- or B +/- menu button (third button). Use the scroll wheel to adjust the power of that group.
Step 4 – Place your Slave Flashes
You can place your slave flashes on stands and put the stands where you’d like throughout the reception area. Here is where you can get creative. If I’m using a two light configuration (one on camera and one off camera), I like to place my off camera light behind the couple to backlight them. This helps them pop off the background and gives a really nice look. I also will sometimes place the light out of the camera frame at a 90 degree angle to the couple. This creates a lot of depth in the image because you’ll get a lot of cool shadows.
You can also use your off camera flash to place pops of light in other areas of the room. As you transition to using more lights off camera you’ll start to get a good feel of where you like to put them. A good starting point for flashes is to place them in the corners of the dance floor. There’s so many different setup combinations, I can’t possibly go through them all. I’ve linked a YouTube video below on how to light reception venues that’s a great starting point for how to place your lights during receptions.
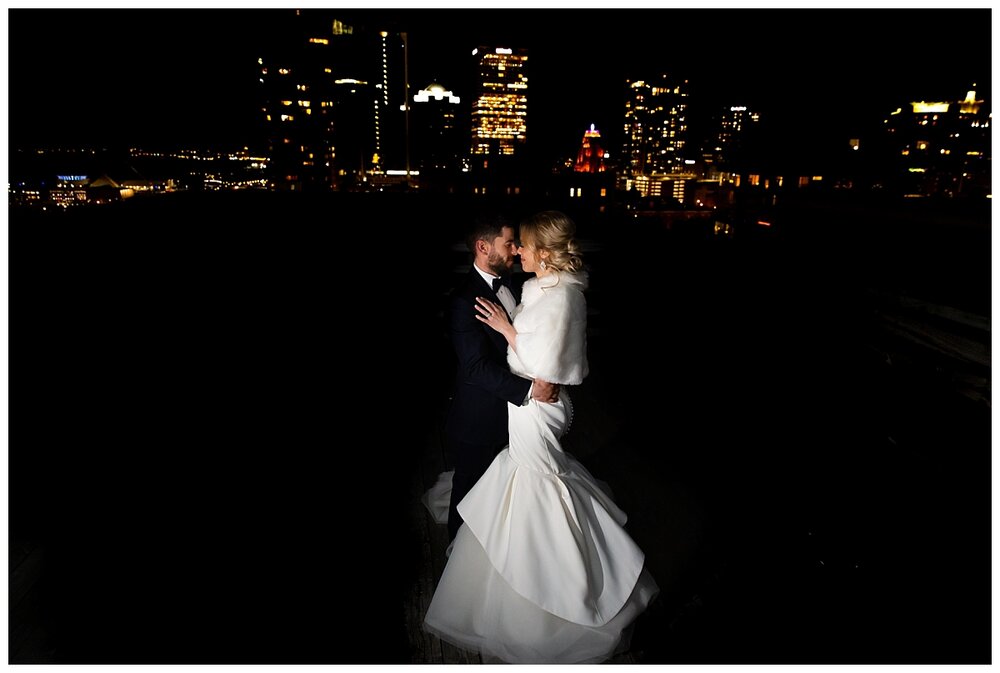
On Camera flash used as trigger (pointed backwards) for off camera bare flash directly behind couple. Flash was at full power. ISO 2000, f 4.0, 1/80
Flash Modifiers
Flash modifiers are great tools to be able to soften your light so you don’t get super harsh flash on your subjects. For portraits you can use something like a soft-box. However this isn’t always the most ideal solution for a wedding day. Some photographers might use umbrellas to diffuse the light and spread it around the room.
I personally use MagMod products to help with this. I use the MagSphere to diffuse the light, spread it out, and make it softer. I use the MagBounce to help bounce my off camera flash when there’s no white walls or ceilings. MagMod has great resources with tons of videos and a Facebook group which I’ve linked below.
Another way to modify your flash is by using gels. I alluded to them earlier, but they’re colored pieces of plastic to place over your flash. You can make your flash warmer, cooler, or even make it fun colors like PINK! This is another fun thing to try when you’re ready to switch up your flash game.
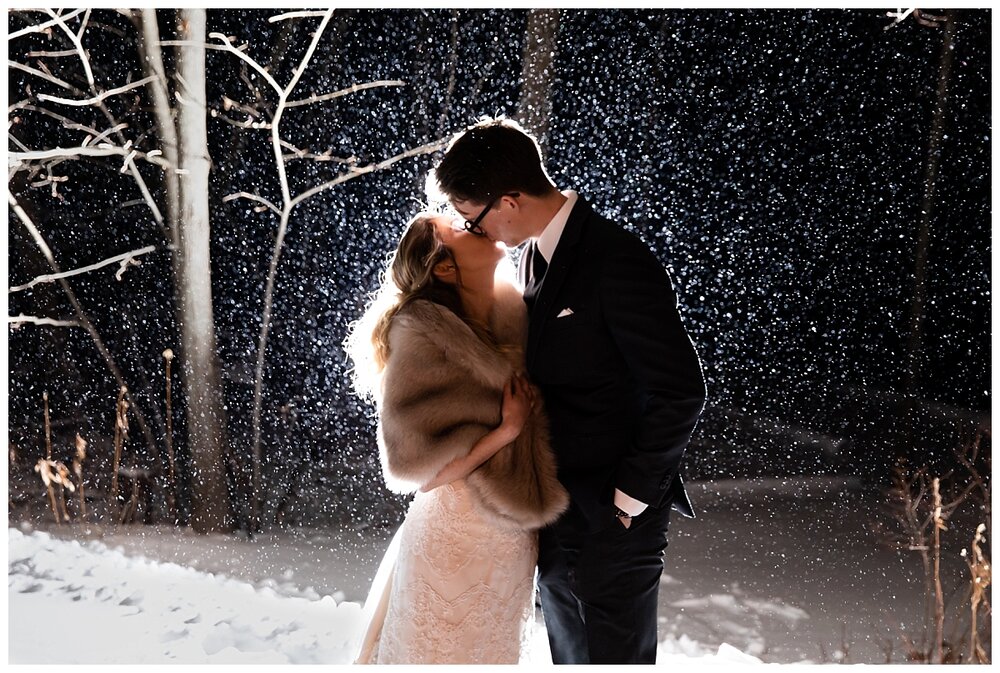
One on camera flash bounced at the ceiling + off camera flash in the back right corner of the dance floor (didn’t edit out stand so you can see it) on my Kupo mini light stand with MagSphere & CTO (color temperature orange) MagGel. ISO 2500, f 4.0, 1/100.
Resources
Helpful Facebook Groups:
Speedlight and Strobe Fundamentals
Helpful Youtube Videos:
How to Light Wedding Reception Venues
If you have anything you’d like me to add to this post, comment below and tell me what you want to know!
Let's Connect
Fill out the form below or e-mail me at nicole@nicolemirophotos.com


SHARE THIS POST: